

DIY Nail Trimming for Dogs: A Step-by-Step Guide with Positive Reinforcement
Trimming your dog’s nails at home reduces visits to the groomer, saving you time and money!
But it can be a scary task.
In this blog, I’ll share how to perform nail trimming with positive reinforcement.
Supplies for Trimming Your Dog’s Nails
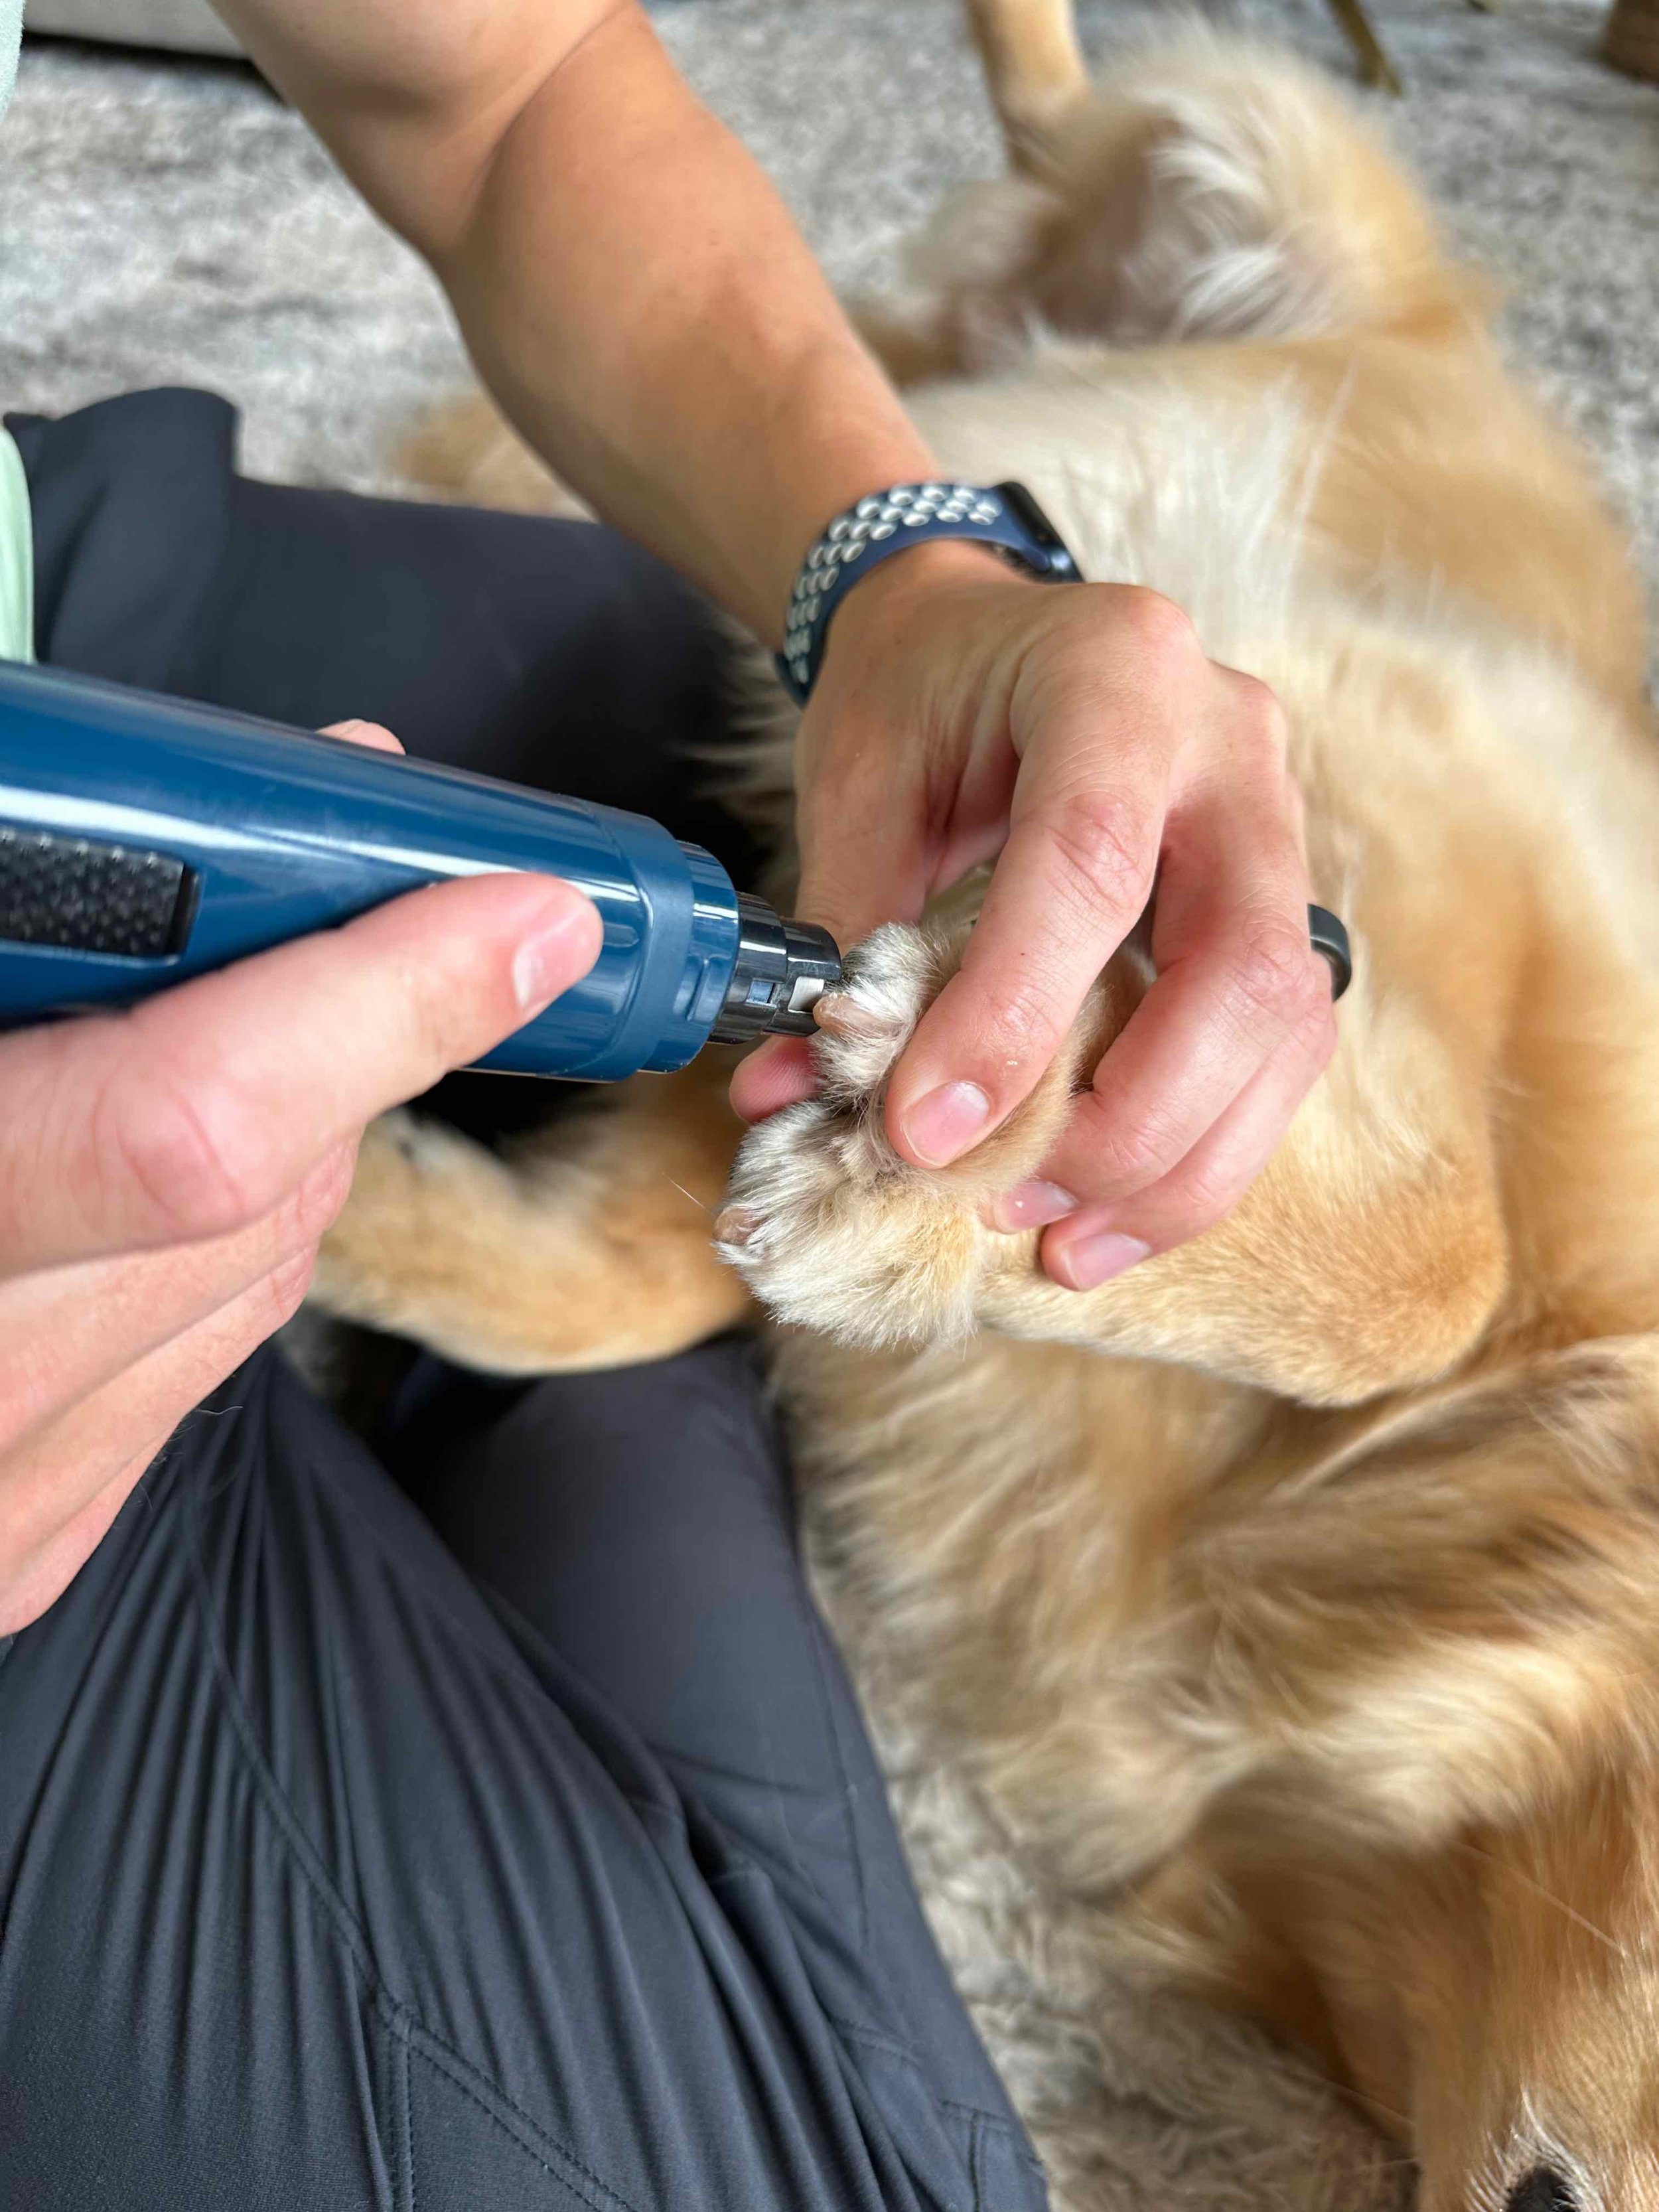
There are a variety of nail clippers on the market. However, I find a nail grinder is safe and easy to use.
Getting Started - Don’t use the nail grinder yet!
First, warm up your dog to the idea of having their paws handled. Try these three tasks while offering treats:
Hold each paw in your hand
Touch their nails one at a time
Rub the bottom of their paw pads
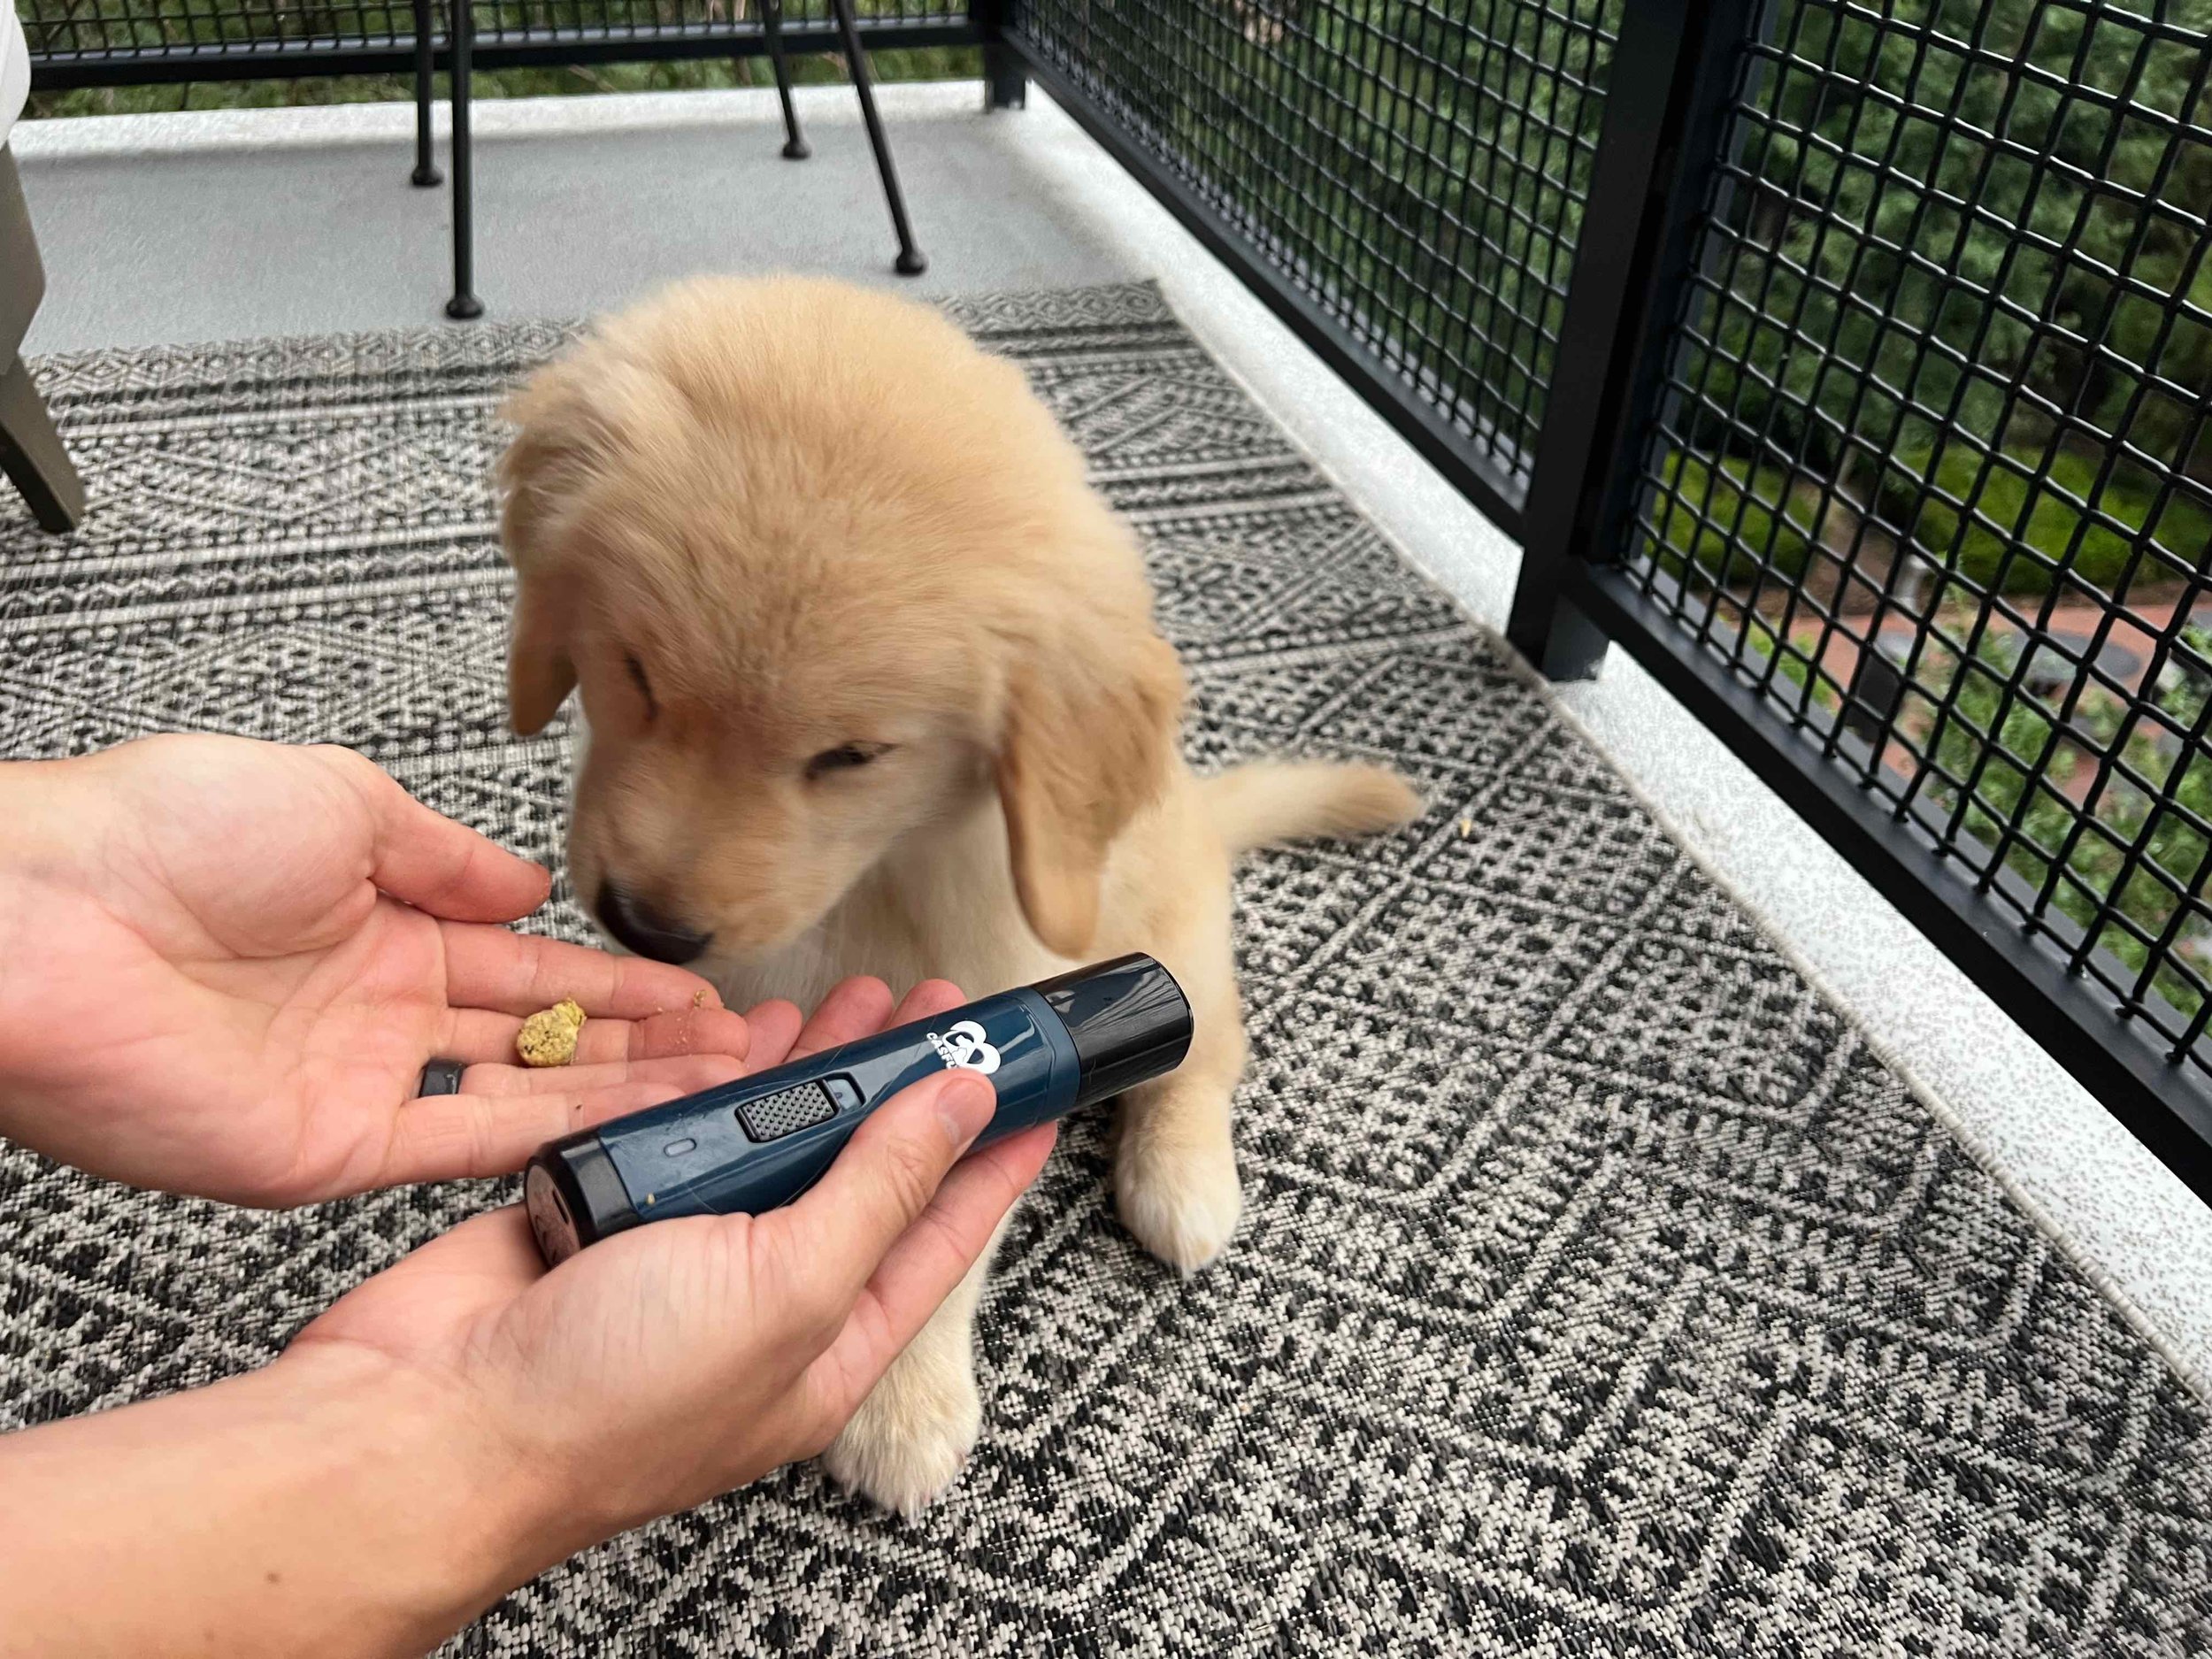
Now Introduce the Nail Grinder
Keep the nail grinder OFF.
Let your dog sniff the nail grinder while offering treats.


Seems Easy Enough? Here’s What’s Next:
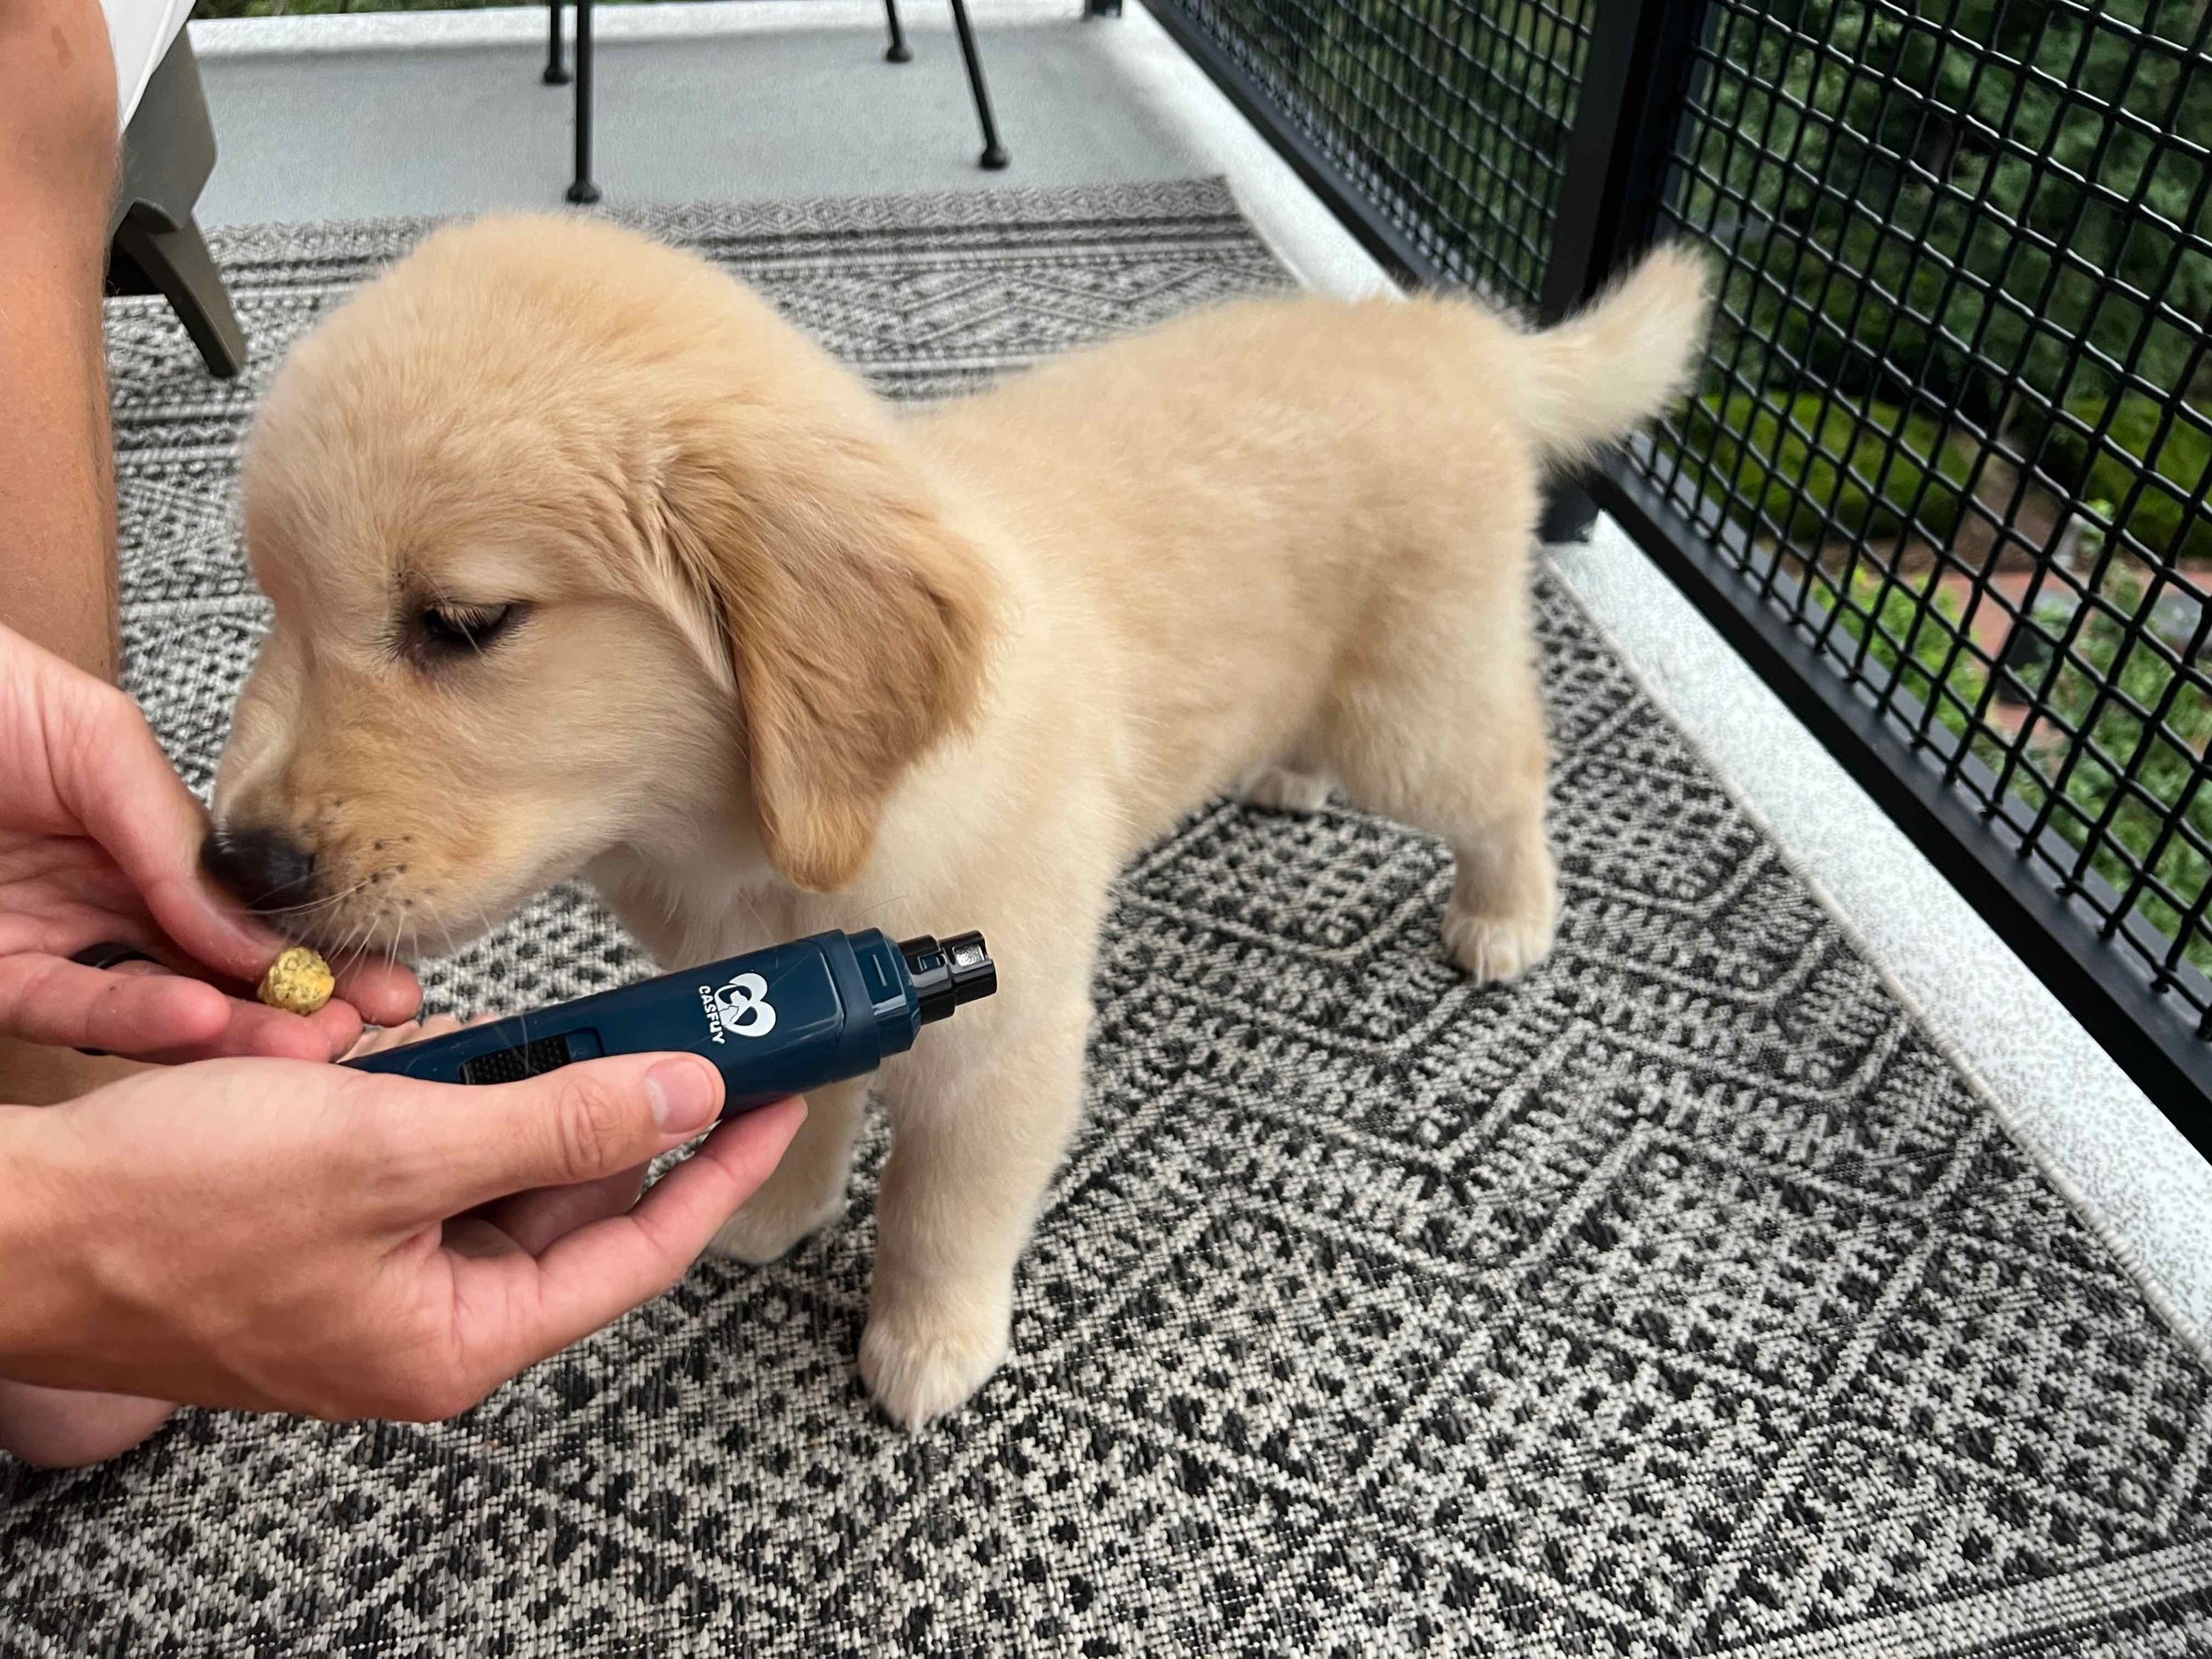
Bring the nail grinder closer so that it touches your dog’s paws.
Keep the grinder OFF.
Continue to offer treats and praise.


Let Your Dog Get Used to the Noise
Turn the grinder ON a few feet away from your dog to let them hear the noise.
The grinder I use is pretty quiet, and Emma didn’t seem to react to it turning off/on.
Bring the nail grinder closer to your dog while offering treats.
Let Your Dog Get Used to the Vibrations
While the nail grinder is on, bring it close to your dog’s paws so they feel the vibration.
Do not try and cut a nail yet.
I know your goal is to cut their nails, but at this point, you just want to let them get used to this brand new thing you’re bringing toward them.
Remember, this slow “warm up” and extra bit of work now can make for a lifetime of stress-free nail cutting.

Pro Tip: To help make it a positive experience, let your dog lick pet-friendly peanut butter off a mat to distract them while you are handling their feet.
Finally! Time to Trim a Nail
Try trimming off just the very tiniest tip from one front paw nail.
Only do one nail.
Offer lots of happy praise and a treat if your puppy lets you.
Even if they let you, just do one. Repeat every day until your dog lets you do this and doesn’t seem to mind.
Slowing Continue Trimming Nails
Start with 1-2 nails.
If you only get through one paw, that is okay. Keep working your way through as tolerated by your dog.
Remember to offer treats and use upbeat words of praise (“you’re the best puppy in the whole wide world! Yes!”) to continue to make this a positive experience.
The goal would be that when your dog sees the nail grinder in the future, they associate it with treats and a fear-free experience.
Like many tasks of dog training, trimming nails takes practice and consistency.
Tips for How to Trim your Dog’s Nails
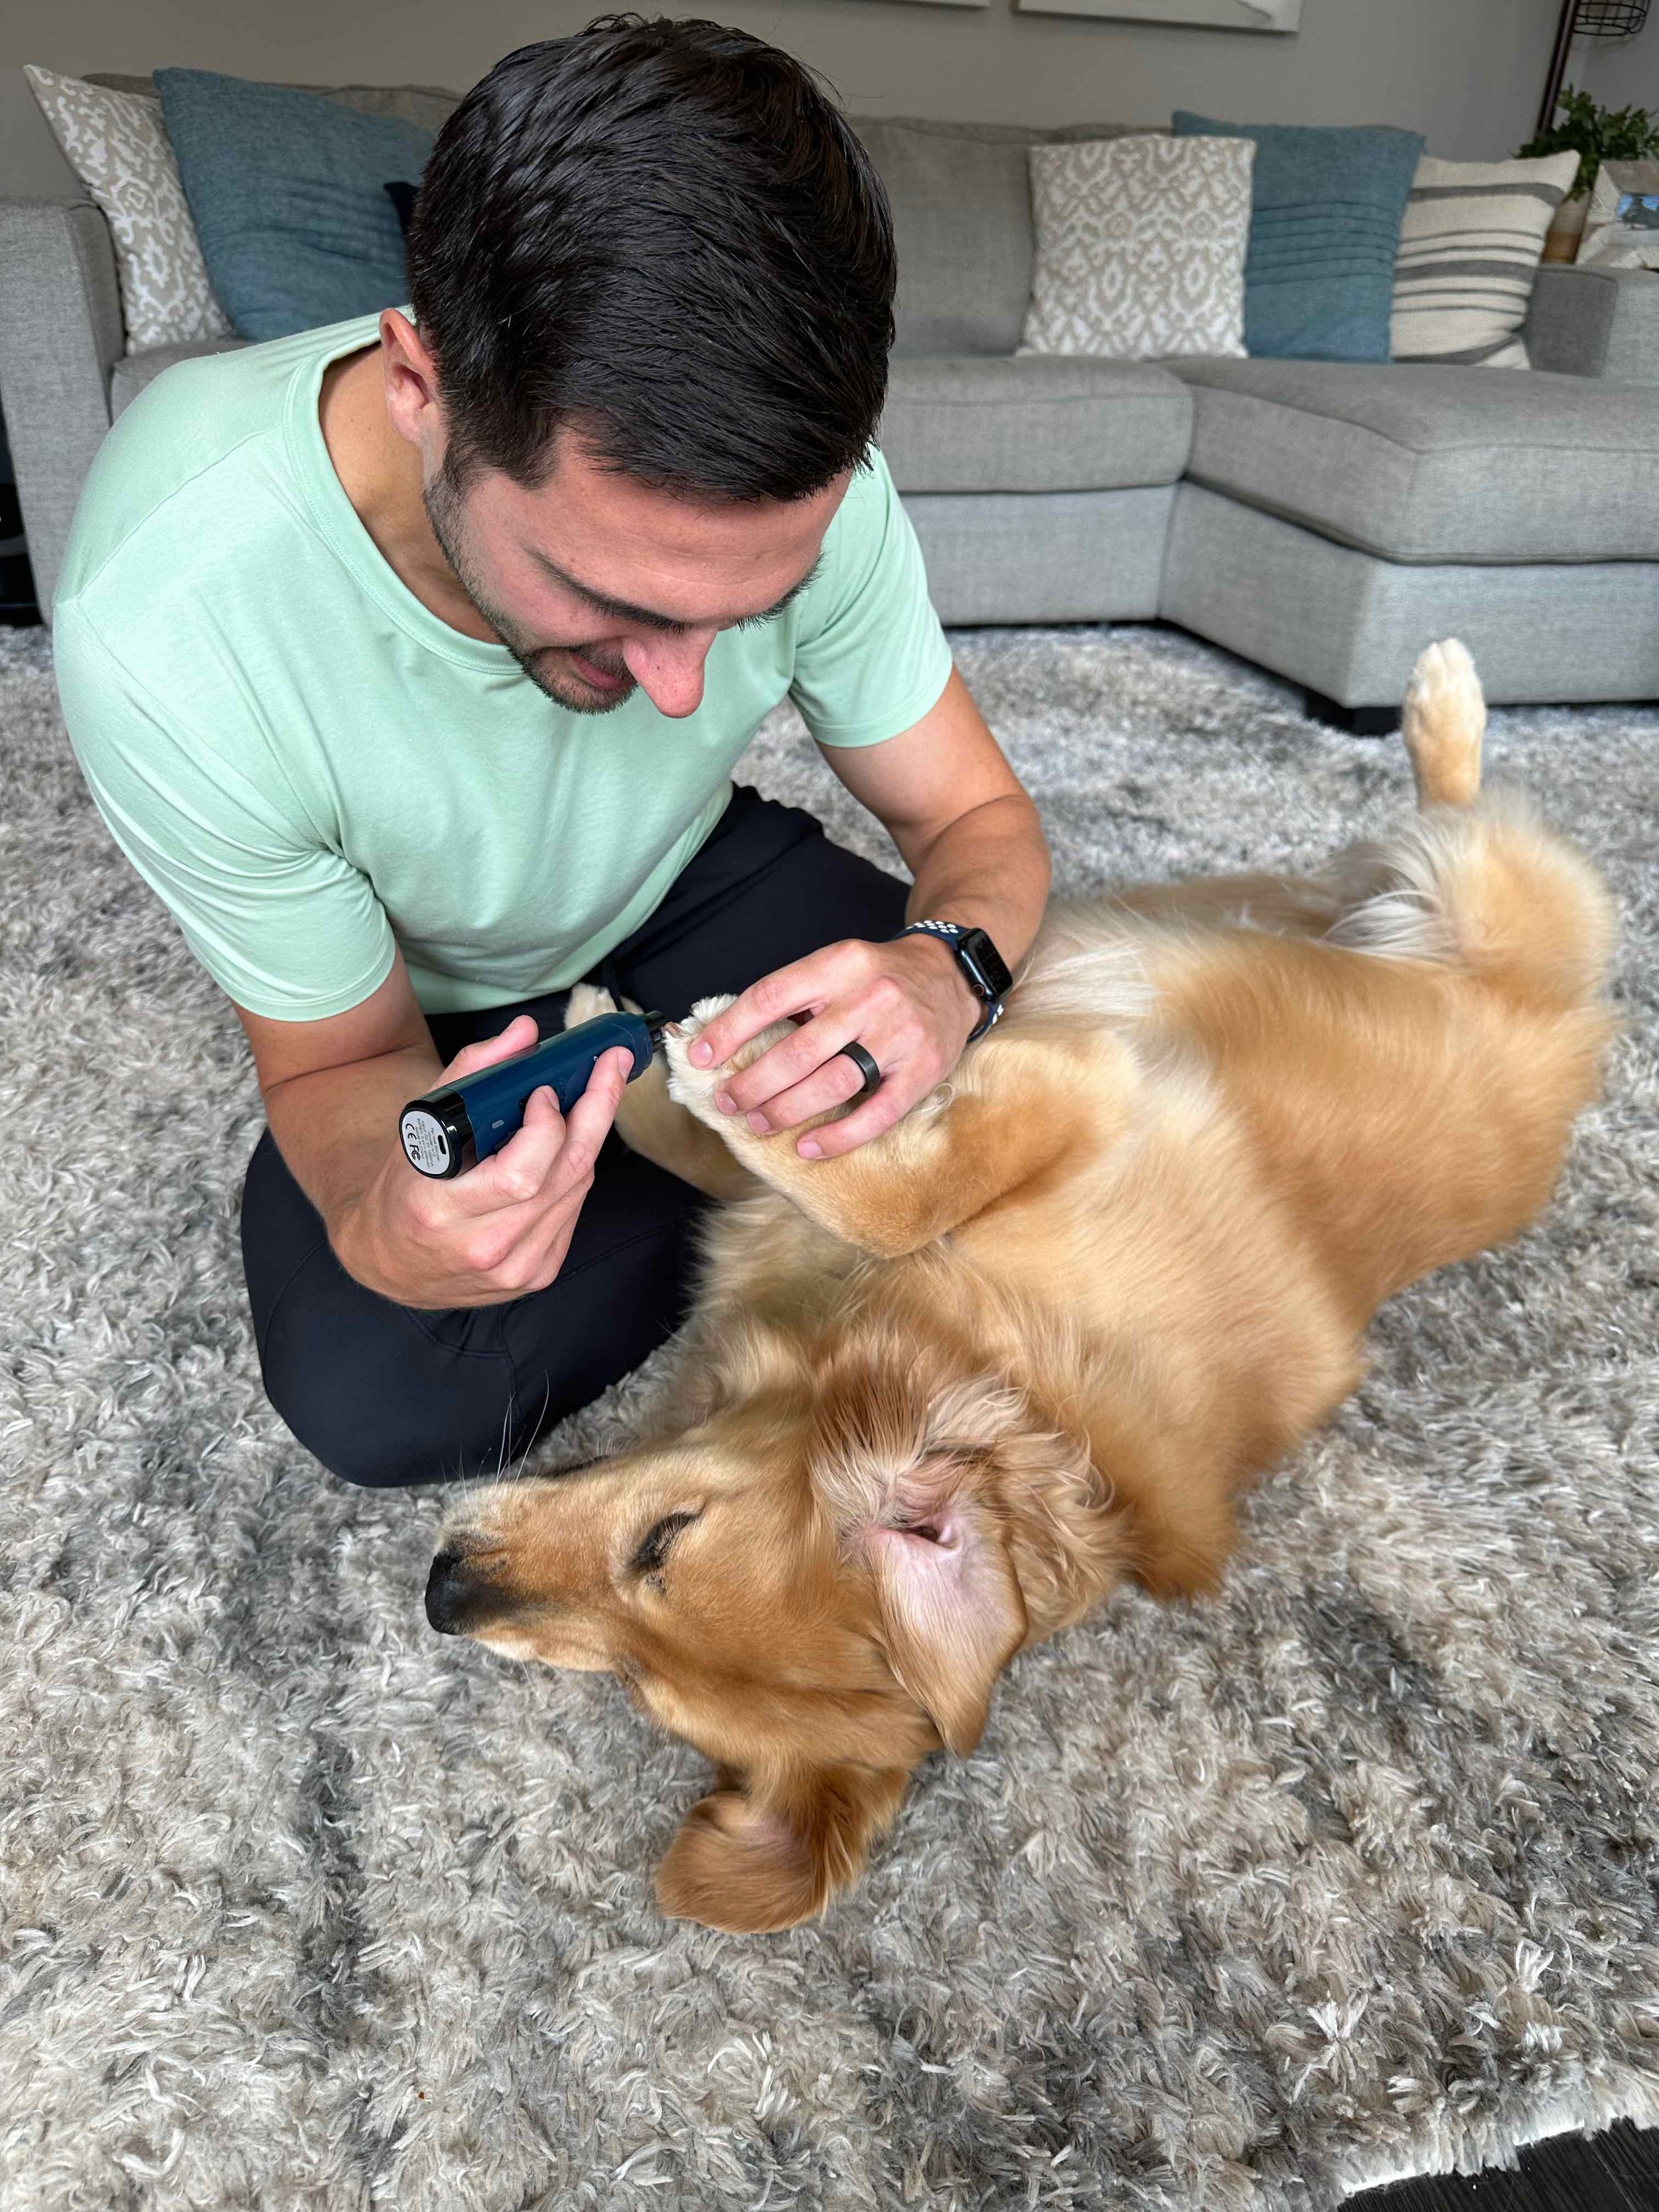
🔹 Keep your dog’s hair back to avoid it getting caught in the nail grinder.
🔹 Cut only the tip of the nail straight across.
🔹 Support your dog’s toe firmly but gently.
🔹 To extend your dog’s nail for a better view, push your thumb slightly up and backward on the pad while pushing your forefinger forward.
🔹 Hold the grinder towards the top for more stability and control.
🔹 Do not rush. Do not plan to cut all the nails the first day or even the first week.
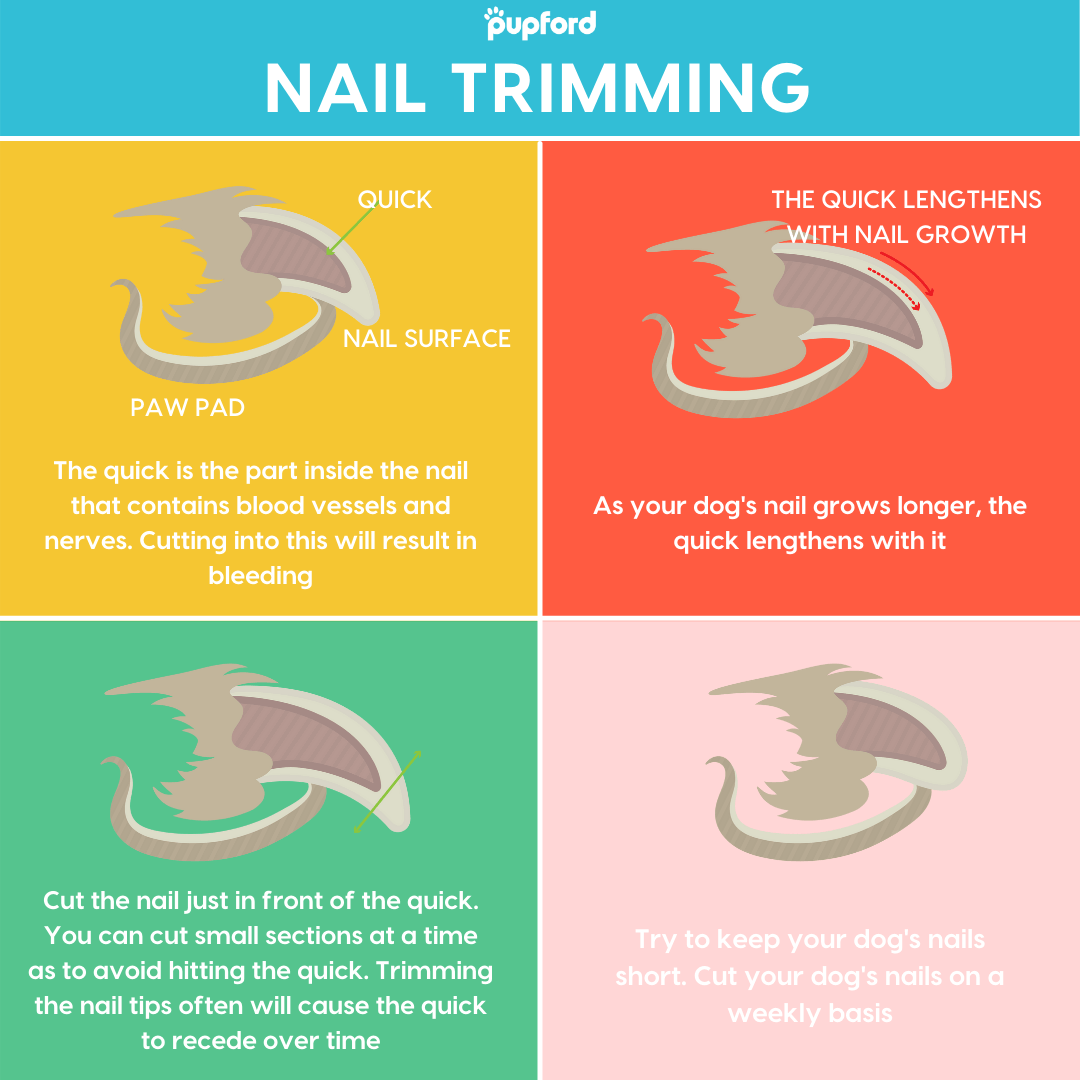
How to Avoid Cutting the Nail Too Short
Cutting a nail too short is called “quicking.” It is called this because you hit the “quick” of the nail, which is where the nerves and blood vessels live. This will cause a lot of bleeding and likely your dog will pull back quickly.
To reduce the risk of cutting the quick of your dog’s nail, avoid clipping past the curve of the nail.
Try this instead: Grind across the bottom of the nail and then carefully in from the tip of the nail, smoothing rough edges.
How to Stop a Nail from Bleeding if you Accidently Cut the Quick
Compress the nail into a clean cloth for 2-3 minutes.
Next, cup your hand and pour some styptic powder, cornstarch, or baking soda into the palm.
Gently dip the bleeding nail into the powder. Repeat as needed.
To aid clotting, don’t wipe away the blood before dipping it.
Once the bleeding stops, try to keep the dog off their feet for at least 30 minutes.
Turn Nail Trimming into a Routine
Pick a day of the week to consistently trim your dog’s nails. For example, every Sunday I use Emma’s food as treats while trimming her nails.
Trimming her nails consistently helps the quick recede, which reduces the chance I will cut it and makes the task fear-free for me as well.
FAQ
-
We started the initial steps of nail trimming with Emma when she was 10 weeks old.
-
We purchased this nail grinder from Amazon and find it works well for both our puppy and adult golden retrievers.
-
Use a high-value treat during nail trimming. This can vary for each dog, but it is a treat that your dog absolutely loves! Ellie and Emma will do backflips for their food, so my wife will offer one piece at a time while I trim their nails.
-
This technique works best when you have two people with your dog. If you are working solo, peanut butter spread on a mat that sticks to the floor is a great option.
-
The quick of the nail is where the nerves and blood vessels live.
If you cut a nail too short, you risk hitting the “quick” of the nail, which may cause discomfort and a lot of bleeding.
-
Roughly every 3-4 weeks for an adult golden retriever.
Interested in more training tips for your pup?
We created an app for you and it’s FREE!

